
So you’re faced with the task of insulating your attic, but you’re not quite sure where to begin. Don’t worry, you’re not alone. Many homeowners find themselves unsure about how to properly insulate this often neglected area of their homes. However, insulating your attic is an essential step towards increasing energy efficiency, reducing heating and cooling costs, and maintaining a comfortable living space. In this article, we will guide you through the process of insulating your attic, providing you with the necessary knowledge and tips to tackle this project with confidence. Insulating your attic is a crucial step in keeping your home comfortable and energy-efficient. Without proper insulation, your attic can become a major source of heat loss in the winter and heat gain in the summer. So how do you go about insulating your attic? Follow this comprehensive guide to ensure you choose the right type of insulation, determine the proper quantity, prepare and clean the attic, ensure proper ventilation, seal air leaks, install the insulation correctly, insulate attic access points, consider hiring a professional if needed, and take necessary safety measures. Additionally, learn how to monitor and maintain your attic insulation for long-lasting effectiveness.
Choose the Right Type of Insulation
Before you start insulating your attic, it’s crucial to choose the right type of insulation. The type you choose will depend on various factors, including your climate, budget, and personal preference. There are three main types of insulation commonly used in attics: loose-fill insulation, batt insulation, and spray foam insulation.
Assess the Existing Insulation
Before you begin, take the time to assess the existing insulation in your attic. Determine whether it is sufficient and in good condition. If you already have insulation, you may only need to add more to increase its effectiveness. However, if the existing insulation is damaged or inadequate, you may need to remove it entirely and start from scratch.
Consider the R-Value
The R-value is a measure of an insulation material’s thermal resistance. The higher the R-value, the more effective the insulation will be in preventing heat transfer. When choosing insulation for your attic, consider the recommended R-value for your climate zone. The Department of Energy provides guidelines specifying the minimum R-value for different regions of the United States.
Evaluate the Insulation Materials
Different insulation materials have different characteristics, so it’s important to evaluate them before making a decision. For example, fiberglass insulation is affordable and easy to install, but it can be irritating to the skin and lungs if proper safety precautions are not taken. On the other hand, spray foam insulation provides excellent coverage and air sealing but can be more expensive. Research the pros and cons of each material to determine which one best suits your needs.
Determine the Insulation Quantity
Once you’ve chosen the right type of insulation, it’s time to determine the quantity you’ll need for your attic. This involves calculating the area of your attic, checking the recommended R-value, and determining the amount of insulation needed.
Calculate the Area of the Attic
Measure the length and width of your attic to calculate its area. Multiply these measurements together to get the total square footage. Keep in mind that attics often have irregular shapes and obstacles, so it’s essential to measure each section carefully.
Check the Recommended R-Value
Refer to the recommended R-value guidelines for your climate zone to determine the level of insulation you need. The higher the R-value, the thicker the insulation should be. Aim to achieve the recommended R-value for optimal energy efficiency and comfort.
Determine the Amount of Insulation Needed
Once you know the total square footage of your attic and the desired R-value, you can calculate the amount of insulation you’ll need. Manufacturers provide information on the coverage area of their insulation products, allowing you to determine the number of bags or rolls required. It’s recommended to purchase slightly more insulation than you calculated to account for any gaps or irregularities.
Prepare and Clean the Attic
To ensure a successful insulation project, it’s essential to prepare and clean your attic beforehand. This involves removing any obstacles, addressing moisture issues, and cleaning the attic area thoroughly.
Remove Any Obstacles
Before you start insulating, clear the attic of any obstacles that may hinder the installation process. This includes items such as stored belongings, debris, and insulation remnants. Create a clear and accessible space to work in.
Address Any Moisture Issues
Moisture can be a major problem in attics, leading to mold growth and insulation damage. Before insulating, address any moisture issues by identifying and fixing roof leaks, improving ventilation, and addressing any plumbing or HVAC system issues.
Clean the Attic Area
A clean attic space is crucial for effective insulation installation. Remove any dust, dirt, or debris from the attic floor and other surfaces. This ensures that the insulation material adheres properly and provides consistent coverage.
Ensure Proper Ventilation
Proper ventilation is vital in an insulated attic to prevent moisture buildup and ensure air circulation. Before installing insulation, check the existing attic ventilation and make any necessary adjustments or additions.
Check the Attic Ventilation
Inspect the attic ventilation system to ensure it’s functioning properly. Look for signs of blockage, such as debris or insulation obstructing vents or soffit vents covered with paint. If there are any issues, clear the vents and ensure they are open and free of obstructions.
Install Proper Ventilation
If your attic lacks proper ventilation or requires improvement, consider installing additional ventilation components. This may include ridge vents, gable vents, or powered exhaust fans. Good ventilation helps to prevent the buildup of heat and moisture, maintaining a healthy attic environment.
Seal Air Leaks
Air leaks in your attic can compromise the effectiveness of your insulation. Identifying and sealing these leaks is essential to create an airtight and energy-efficient attic space.
Identify and Seal Leaks
To identify air leaks, inspect your attic for any visible cracks, gaps, or holes. Common areas prone to leaks include around recessed lights, plumbing vent pipes, electrical wiring, and chimneys. Seal these leaks using appropriate materials such as caulk, expanding foam, or weatherstripping.
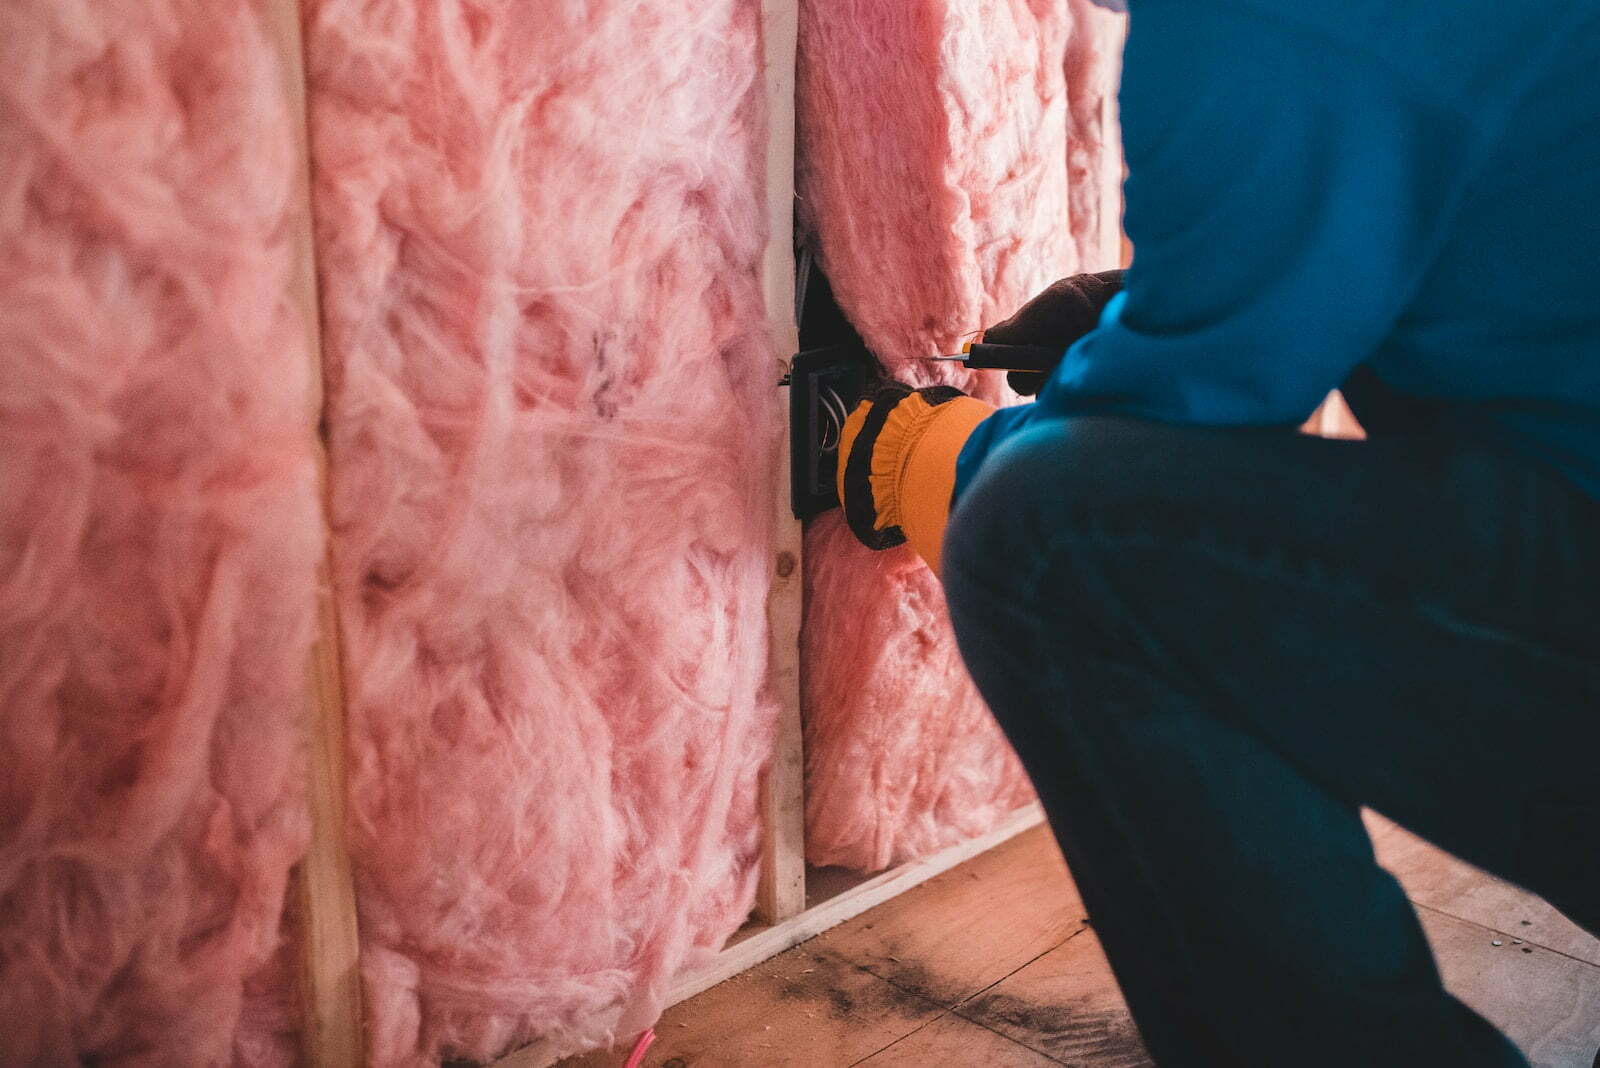
Insulate Electrical Outlets
Electrical outlets can be significant sources of air leakage in the attic. Insulate these outlets by using foam gaskets or insulation pads. Simply remove the outlet cover, fit the insulation product behind it, and reinstall the cover for a tighter seal.
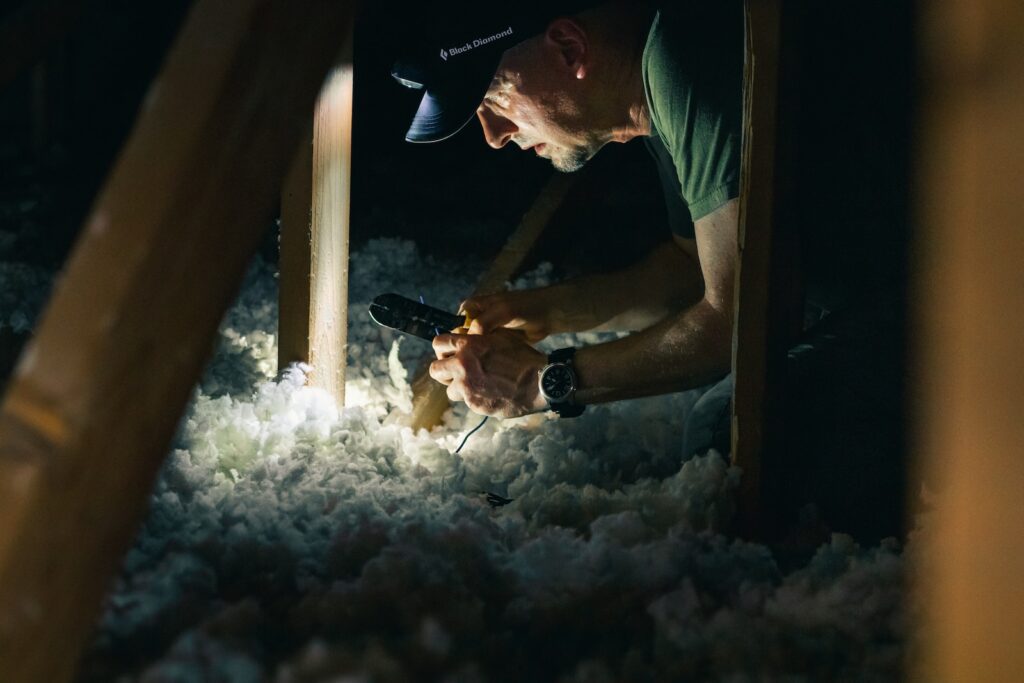
Install Insulation
Now that your attic is prepared, it’s time to install the insulation. This process involves choosing the installation method, laying insulation on the attic floor, and installing insulation in the rafters.
Choose the Installation Method
There are two primary methods of insulation installation: blown-in and batt insulation. Blown-in insulation involves using a machine to blow loose-fill insulation evenly across the attic floor, while batt insulation consists of pre-cut panels that are laid manually.
Lay Insulation on the Attic Floor
If you choose to lay insulation on the attic floor, start by working from the outer walls inward. Lay the insulation perpendicular to the joists, ensuring each piece fits tightly against adjacent pieces. Use a utility knife to trim insulation as needed to fit around obstacles such as pipes or electrical wires.
Install Insulation in the Rafters
For a more energy-efficient option, you can choose to install insulation in the rafters instead of on the attic floor. This approach creates a conditioned or semi-conditioned attic space. Install rigid foam insulation panels or spray foam insulation between the rafters, ensuring a snug fit and proper ventilation channels.
Insulate Attic Access Points
Attic access points, such as hatches or staircases, are often overlooked but can contribute to significant energy loss. Insulating these areas helps maintain a consistent temperature throughout your home and prevents conditioned air from escaping.
Insulate the Attic Hatch or Door
To insulate the attic hatch or door, attach weatherstripping around the edges to create a tight seal. You can also add foam insulation board or insulation blankets to provide further thermal resistance.
Insulate the Attic Staircase
If your attic has a staircase, insulating it is equally important. Install an attic staircase insulator kit, which consists of an insulated cover and a draft seal. This will help prevent air leakage and maintain the temperature balance between your living space and the attic.
Consider Hiring a Professional
While insulating your attic can be a DIY project, certain circumstances may warrant hiring a professional insulation contractor. Consider the complexity of the project and your level of comfort and expertise before deciding whether to hire a professional.
Assess the Complexity of the Project
If your attic has numerous obstacles, tight spaces, or difficult access points, it may be more challenging to install insulation yourself. Additionally, if your attic requires significant repairs or remediation, a professional contractor can handle these tasks effectively.
Find Qualified Insulation Contractors
If you decide to hire a professional, take the time to research and find qualified insulation contractors in your area. Look for contractors with proper certifications, licenses, and positive customer reviews. Obtain multiple quotes and compare their services and pricing before making a final decision.

Safety Measures
When working in an attic, it’s important to prioritize safety. Take these necessary precautions to ensure a safe and accident-free insulation installation process.
Wear Proper Protective Gear
Before entering the attic, ensure you are wearing appropriate protective gear. This includes safety goggles, gloves, a respirator mask, and clothing that covers your body. Insulation materials can be irritants, so it’s crucial to protect yourself from potential skin and respiratory hazards.
Use Caution with Electrical Wiring
When installing insulation or sealing air leaks, be cautious around electrical wiring. Avoid touching or tampering with any live wires. If you’re unsure, consult a qualified electrician to ensure your safety.
Work with a Partner
Working in an attic can be challenging, especially when navigating through tight spaces or maneuvering insulation materials. Whenever possible, have a partner assist you. They can help with handling materials, ensuring your safety, and providing assistance in case of an emergency.
Monitor and Maintain the Insulation
Installing insulation in your attic is not a one-time task. To ensure its long-lasting effectiveness, it’s essential to monitor and maintain the insulation regularly.
Regularly Check for Damage or Compromises
Inspect your attic insulation periodically to check for any signs of damage or compromises. Look for areas where insulation may have shifted, compressed, or become moist. Additionally, monitor for any signs of pest activity or mold growth, as these can undermine the performance of your insulation.
Perform Necessary Repairs or Upgrades
If you notice any damage or compromises in your attic insulation, it’s important to address them promptly. Perform necessary repairs, such as replacing damaged insulation or sealing air leaks. Upgrading or adding insulation in response to changes in climate or building codes can also help maintain optimal energy efficiency.
By following these steps and taking the time to choose and install the right insulation for your attic, you can improve your home’s energy efficiency and comfort. Whether you tackle the project yourself or enlist the help of a professional, insulating your attic is an investment in long-term savings and a more eco-friendly lifestyle. Remember to prioritize safety, maintain and monitor your insulation regularly, and enjoy the benefits of a well-insulated attic.