
So you’ve finally decided to take on the exciting task of installing a new light fixture in your home. Whether you’re looking to upgrade the outdated one in your living room or add a touch of elegance to your dining area, this simple guide will walk you through the step-by-step process. No need to be an expert handyman – with a few tools and a little patience, you’ll have your new light fixture shining brightly in no time. Ready to shed some light on this DIY project? Let’s get started!
Gathering Supplies
Before you embark on installing a new light fixture, it’s important to gather all the necessary supplies. First and foremost, you’ll need a new light fixture, preferably one that suits your aesthetic preferences and fits the space where you’ll be installing it. You’ll also need a screwdriver, wire cutters, electrical tape, wire connectors, and a voltage tester. Make sure to have a stable ladder or stepladder, along with protective gear such as safety goggles and gloves.
Choosing the Right Light Fixture
When selecting a new light fixture, there are a few important factors to consider. First, think about the purpose of the room where the fixture will be installed. Is it a high-traffic area, like a hallway? Or is it a more intimate space, like a bedroom? The type of lighting you choose should complement the room’s function.
Additionally, consider the size and style of the fixture. Measure the area where it will be installed to ensure a proper fit. If you have a specific design or theme in mind, choose a fixture that matches or enhances it. Remember, the goal is to create a cohesive and visually appealing space.
Measuring and Determining Placement
Once you’ve chosen the right light fixture, it’s crucial to measure and determine its placement correctly. Start by measuring the distance between the electrical box and the desired location for the fixture. This will help you ensure the wiring is long enough to reach.
Consider the height at which you want the fixture to hang. Generally, light fixtures are often placed approximately 7 feet above the floor. However, this may vary depending on the room and personal preference. Take into account the ceiling height and any potential obstructions, such as doors or furniture, that might affect the fixture’s placement.
Turning Off the Power
Before starting any electrical work, always turn off the power to the area where you’ll be working. Safety should always be the top priority, and cutting off the power ensures that you won’t risk electrical shock. Locate the circuit breaker panel in your home and flip the switch that corresponds to the area where you’ll be replacing the light fixture. To be extra cautious, it’s a good idea to use a voltage tester to confirm that the power is indeed off.
Preparing the Workspace
Now that you’ve turned off the power, it’s time to prepare the workspace. Place a stable ladder or stepladder directly beneath the light fixture. Ensure that the ladder is on level ground and that its weight capacity can support your weight. Clear the area around the fixture and lay down a protective covering, such as a drop cloth or plastic sheet, to catch any debris or dust that may fall during the installation process. Lastly, gather all your tools and supplies within easy reach, so you won’t have to scramble for them while on the ladder.
Removing the Old Fixture
With the preparation done, it’s time to remove the old light fixture. Remember to exercise caution during this process.
Turning Off the Power
Before starting, double-check that the power to the area is turned off. You don’t want to accidentally expose yourself to live wires while removing the old fixture.

Removing the Old Fixture
Begin by removing any screws or hardware that are holding the old fixture in place. Carefully detach the fixture from the mounting plate on the ceiling or wall. If it is secured with decorative coverings, gently slide or pry them off. Take your time to ensure you don’t damage or crack any delicate parts of the fixture.
Examining the Wiring
Once the old fixture has been removed, take a moment to examine the wiring behind it. Look for any signs of damage or wear, such as frayed wires or loose connections. If you notice any issues, it’s best to call a professional electrician to address them before proceeding further.
Disconnecting the Wires
Before disconnecting the wires, take pictures or make note of their connections. This will make it easier to reconnect the new fixture later. Using wire cutters, carefully separate the wires of the old fixture from the house wiring. You may need to unscrew wire nuts or untwist the wires if they are secured in that manner. Remember to handle the wires gently and try to avoid twisting or kinking them.
Removing the Mounting Plate
Once the wires are disconnected, remove the old mounting plate from the ceiling or wall. Unscrew any screws or bolts securing it in place and gently slide it free. If the plate is stubborn or stuck, be patient and use gentle force to avoid damaging the surrounding area.
Installing the New Fixture
With the old fixture safely removed, it’s time to install the new one. Take your time and follow the steps carefully to ensure a successful installation.
Preparing the New Fixture
Before installing the new fixture, familiarize yourself with its components and instructions. Check that all the necessary parts are included and that everything is in good condition. If any pieces are missing or damaged, contact the manufacturer or return the fixture for a replacement.
Attaching the Mounting Plate
Begin by attaching the new mounting plate to the electrical box on the ceiling or wall. Align the screw holes and use the provided screws or bolts to secure it in place. Ensure that the plate is snug and level, as this will provide a stable base for the new fixture.
Connecting the Wires
Now it’s time to connect the wiring of the new fixture to the house wiring. Start by matching the wires according to the notes or pictures you took earlier. Twist the corresponding wires together, making sure to match the black (or sometimes red) wires, white (or sometimes neutral) wires, and, if present, green (or ground) wires. Secure the connections with wire connectors, also known as wire nuts, and wrap them with electrical tape for added safety.
Securing the Fixture
After the wires are connected, carefully position the new fixture over the mounting plate. Align the screw holes on the fixture with those on the plate and attach it securely using the provided screws. Make sure the fixture is level and centered before tightening the screws fully.
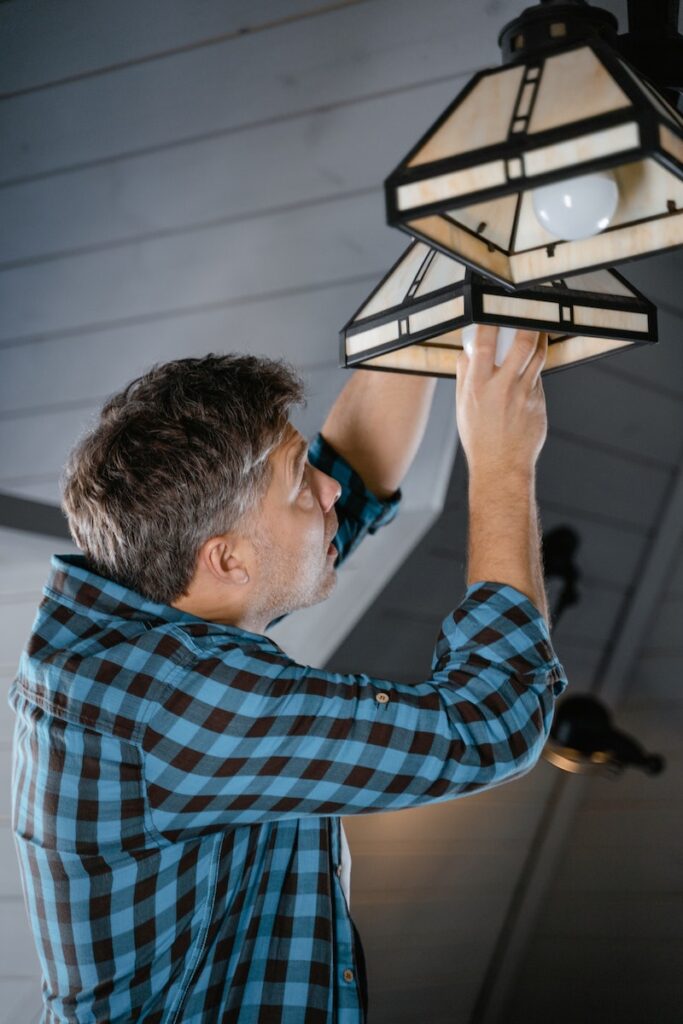
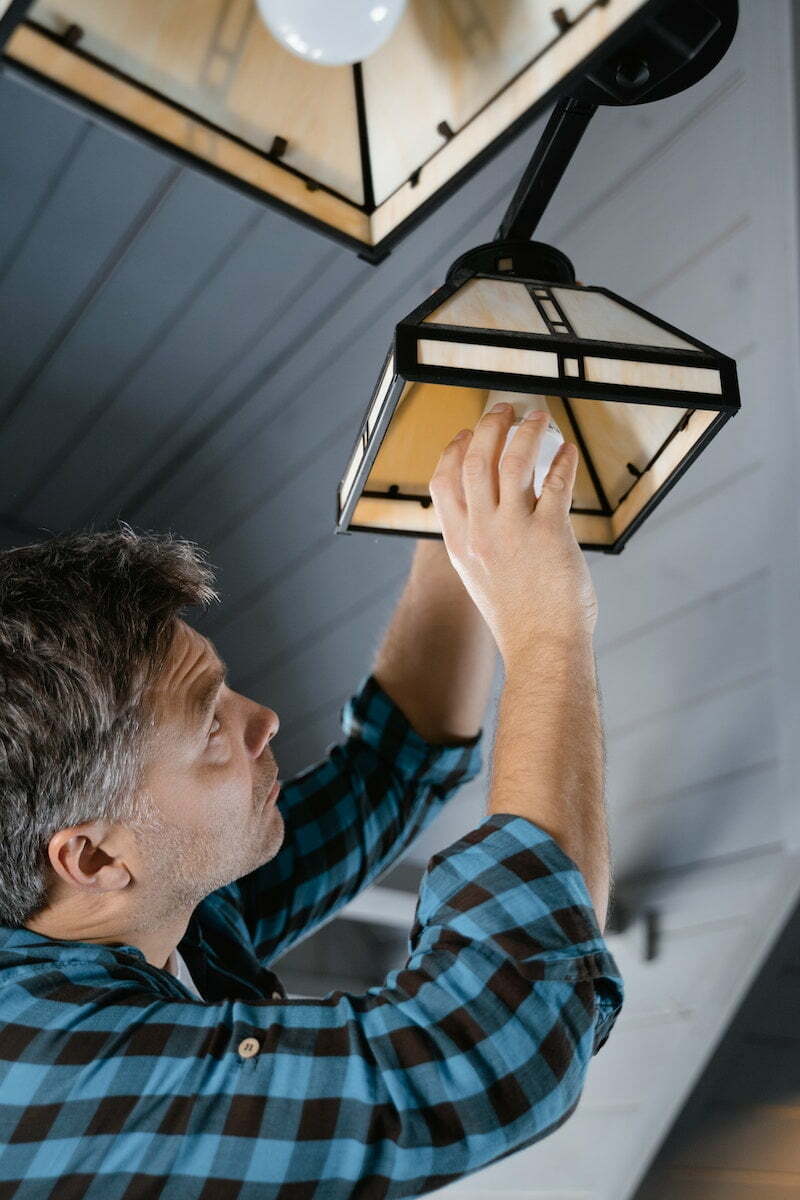
Installing the Light Bulbs
With the fixture securely in place, it’s time to install the light bulbs. Check the manufacturer’s instructions for the maximum wattage and recommended bulb type for your fixture. Screw the bulbs into their designated sockets, being cautious not to overtighten as it may damage the fixture. Finally, turn the bulbs on gently to ensure they are working properly.
Testing and Finishing
Now that the new fixture is installed, it’s time to test and finish the installation process.
Turning On the Power
Before testing the fixture, ensure that the power to the area has been turned back on. Return to the circuit breaker panel and flip the switch that corresponds to the newly installed light fixture. Exercise caution and use a voltage tester to confirm that the power is indeed flowing to the fixture.
Checking for Proper Functioning
Once the power is on, check the new light fixture to ensure it’s functioning correctly. Flip the light switch and observe if the fixture illuminates. If it doesn’t, double-check the wiring connections, light bulb installation, and any switches or dimmers that may be affecting the fixture’s operation. Sometimes a simple adjustment or troubleshooting step can solve the issue.
Adjusting the Light
If you find that the direction or intensity of the light is not to your liking, most fixtures allow for adjustment. Consult the manufacturer’s instructions to learn how to adjust the angle or brightness of the fixture. This will allow you to customize the lighting to suit your needs.
Securing Any Loose Parts
After testing the fixture, inspect it for any loose or wobbly parts. Gently tighten any screws or bolts that may have become loose during the installation process. Ensure that the fixture is securely attached and stable.
Cleaning Up the Workspace
With the installation complete, take a moment to clean up the workspace. Remove the protective covering and dispose of any debris or dust that may have accumulated during the installation. Put away your tools and supplies, ensuring that everything is safely stored for future use. Finally, step back and admire your newly installed light fixture!
Common Issues and Troubleshooting
Even with careful installation, issues may arise. Here are a few common problems that can occur when installing a new light fixture and some troubleshooting tips to resolve them.
Uneven Lighting
If you notice that the light from your new fixture is casting unevenly or creating shadows, one possible cause may be the positioning of the fixture itself. Adjust the angle or orientation of the fixture to distribute the light more evenly. Alternatively, consider adding additional light sources to the room to balance out the lighting.
Flickering Lights
Flickering lights can be a nuisance and may indicate a problem with the wiring or electrical connection. Start by checking that the light bulbs are securely screwed in and not loose. If the flickering persists, inspect the wiring connections and make sure they are tightly secured. If the issue persists, it’s best to consult a licensed electrician to troubleshoot and resolve the problem.
Wires Not Connecting Properly
Sometimes, despite your best efforts, wires may not connect properly during the installation process. Ensure that the wire connections are secure and properly seated within the wire connectors. If the wires continue to detach or loosen, double-check that you are using the correct wire connectors for the gauge of wire you are working with. If necessary, consult a professional electrician for assistance.
Choosing a Dimmer Switch
If you prefer to have dimming capabilities with your new light fixture, ensure that the fixture is compatible with dimmer switches. Not all fixtures are designed to be used with dimmers, so it’s essential to check the manufacturer’s instructions or consult a professional for guidance. Installing an incompatible dimmer switch can damage the fixture or lead to other electrical issues.
Replacing a Light Switch
Sometimes, when installing a new light fixture, you might decide to replace the existing light switch as well. Make sure to turn off the power to the area and follow proper safety precautions when replacing a light switch. If you are uncertain about electrical work or lack experience, it’s best to seek assistance from a professional electrician.
Safety Precautions
Working with electricity can be hazardous, so it’s crucial to take the necessary safety precautions to protect yourself and prevent accidents.
Turning Off the Power
Always turn off the power to the area where you’ll be working. This can be done by flipping the corresponding switch in the circuit breaker panel. Additionally, use a voltage tester to double-check that the power is indeed off before starting any electrical work.
Using a Stable Ladder or Stepladder
When working at heights, such as when installing a light fixture on a ceiling, ensure that you are using a stable ladder or stepladder. Make sure the ladder is placed on level ground, and its weight capacity can support your weight. If needed, have someone spot you or hold the ladder steady while you work.
Wearing Protective Gear
To protect yourself from potential hazards, always wear appropriate protective gear. Safety goggles will shield your eyes from debris or flying particles, while gloves will offer some protection against accidental contact with live wires or sharp edges.
Avoiding Water Contact
Since you’ll be working with electricity, it’s crucial to avoid any contact with water during the installation process. Ensure that your hands are dry and free from moisture before handling any wires or electrical components. If the area you’re working in is damp, consider using a dry towel or wearing rubber gloves for added protection.
Properly Disposing of the Old Fixture
Once the installation is complete, make sure to dispose of the old fixture properly. Check with your local waste management facilities to determine the correct disposal method. Some fixtures may need to be taken to a designated recycling center, while others can be discarded with regular household waste. Proper disposal helps minimize environmental impact and keeps potentially hazardous materials out of landfills.
Conclusion
Installing a new light fixture can be a rewarding project that enhances the aesthetics and functionality of your space. By following the steps outlined in this article and taking the necessary safety precautions, you can confidently tackle this DIY task. Remember to choose the right light fixture for your needs, measure and determine placement carefully, and ensure the power is turned off before starting any electrical work. With patience and attention to detail, you’ll soon be enjoying your newly installed light fixture and the renewed ambiance it brings to your home.