So, you’ve finally decided to tackle the task of laying tile, huh? Whether you’re looking to update your bathroom or revamp your kitchen, knowing how to lay tile is an invaluable skill to have. From choosing the perfect tiles to grouting and sealing, this article will guide you through the step-by-step process of laying tile, leaving you with a beautifully tiled space that you can proudly call your own. Say goodbye to those drab floors or outdated backsplashes – it’s time to transform your space with a touch of DIY magic!
Selecting the Right Tile
When it comes to selecting the right tile for your project, there are a few factors to consider. The first is to determine the purpose of the tile installation. Are you laying tile in a bathroom, kitchen, or outdoor patio? Different areas of the house may require different types of tile to ensure durability and functionality.
Next, consider the tile material and size. Tiles come in a variety of materials, such as ceramic, porcelain, natural stone, and glass. Each material has its own unique characteristics and maintenance requirements. Additionally, the size of the tile can impact the overall aesthetics of the space. Larger tiles can make a room feel more spacious, while smaller tiles can create intricate designs.
Lastly, evaluate the tile’s durability and maintenance requirements. Some tiles may be more prone to stains or damage, while others are more resistant. Think about how the tile will hold up to daily wear and tear, as well as any specific maintenance tasks that may be required, such as sealing or regrouting.
Gathering the Necessary Tools and Materials
Before you begin the tiling process, it’s important to gather all the necessary tools and materials. This will ensure that you have everything you need within reach, making the installation process much smoother.
Some of the essential tools and materials you’ll need include:
- Tile: Choose the type and design that best suits your project.
- Tile adhesive: This is used to bond the tiles to the surface.
- Tile spacers: These small plastic pieces are placed between the tiles to make sure the spacing is even and consistent.
- Trowel: Used to spread the adhesive evenly on the surface.
- Grout: This is used to fill the gaps between the tiles.
- Grout float: A tool used to spread the grout and smooth it into the joints.
- Tile cutter or wet saw: These tools are used to cut tiles to the desired size and shape.
- Level: Helps ensure that the tiles are laid evenly and level.
- Measuring tape: Used to measure the size of the tiles and the layout of the room.
- Sponge: Used to remove excess grout and clean the tiles.
- Bucket: Used to mix adhesive and grout.
Having all these tools and materials ready will save you from constant trips to the hardware store during the installation process.

Preparing the Surface
Before you can start laying your tiles, it’s important to prepare the surface properly. This will ensure that the tiles adhere properly and that the final result is smooth and level.
First, remove any existing flooring or carpet that may be in the area. This will provide a clean slate for your tile installation.
Next, clean and patch the subfloor as needed. Remove any debris or loose materials, and fill in any cracks or holes with a suitable patching compound. Make sure the surface is clean and free of any dust or dirt before proceeding.
Finally, ensure a smooth and level surface. Use a level to check for any uneven areas of the subfloor. If necessary, use a self-leveling compound to even out the surface. A smooth and level surface will provide a solid foundation for your tiles and prevent any future problems.
Planning the Tile Layout
Planning the tile layout is crucial to achieving a professional-looking result. Taking the time to measure and mark the center of the room, dry laying the tiles, considering tile orientation and alignment, and accounting for tile cuts and edging will ensure a seamless and visually appealing finish.
To start, measure and mark the center of the room. This will serve as your starting point for laying the tiles. Use a measuring tape to find the exact center of the room, and mark it with a chalk line or pencil.
Next, dry lay the tiles without adhesive to get a sense of how they will fit in the space. This step allows you to make any necessary adjustments to ensure a balanced and visually pleasing layout. Experiment with different tile orientations and arrangements until you find the one that works best for your space.
When planning the layout, consider the tile orientation and alignment. Do you want the tiles to run parallel or perpendicular to the walls? How will the tiles align with any existing architectural features, such as doorways or windows? Take your time in this step to avoid any unpleasant surprises once the tiles are permanently installed.
Lastly, account for tile cuts and edging. Measure the space where partial tiles will be needed, and plan the layout accordingly. Also, consider the type of edge treatment you want for the tiles, such as bullnose or trim pieces. By planning ahead, you can minimize tile cutting and achieve a clean and polished look.

Mixing and Applying Tile Adhesive
Once you’re ready to begin installing the tiles, it’s important to properly mix and apply the tile adhesive. Following the adhesive manufacturer’s instructions is crucial to ensure a strong bond and a successful installation.
Start by reading and understanding the adhesive manufacturer’s instructions. Different adhesives may require different mixing ratios or application techniques, so it’s important to familiarize yourself with the specific guidelines for the product you’re using.
Next, mix the adhesive to the right consistency. Use a bucket and a drill with a mixing attachment to thoroughly mix the adhesive according to the manufacturer’s instructions. The consistency should be similar to peanut butter – not too dry or too wet.
Once the adhesive is mixed, apply it to the subfloor using a trowel. Start in one corner of the room and spread the adhesive in small sections, working your way towards the opposite end. Make sure to achieve proper coverage by combing the adhesive with the notched side of the trowel. This will create grooves that help the tiles adhere securely to the surface.
Installing the Tiles
With the adhesive in place, it’s time to start installing the tiles. Follow these steps to ensure a smooth and successful installation:
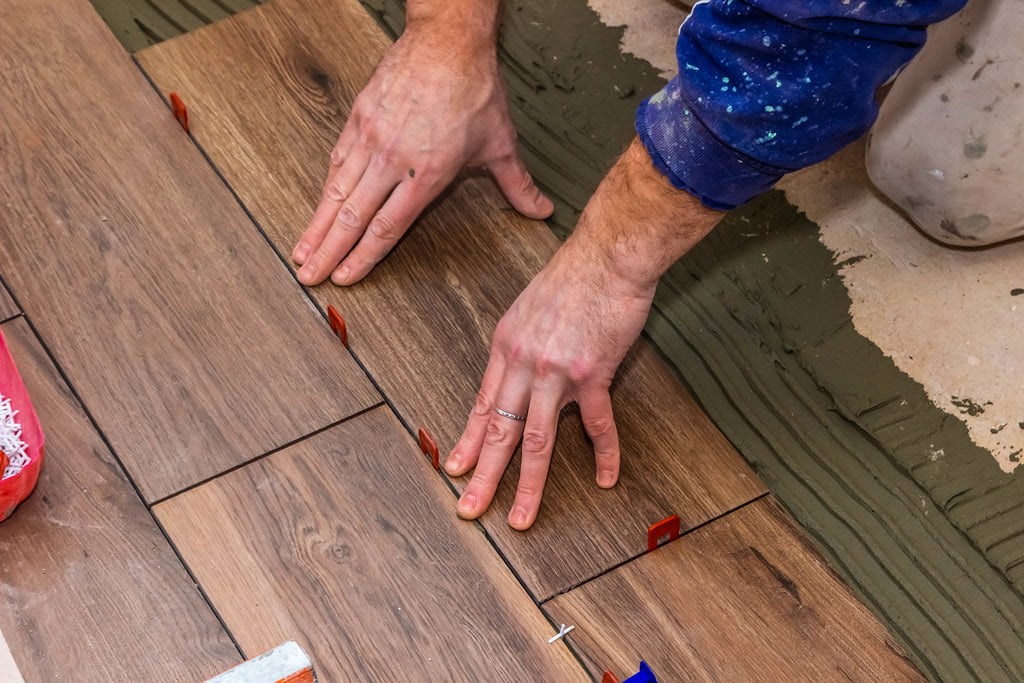
- Start from the center and work outwards. Place the first tile at the center point you marked earlier, and press it firmly into the adhesive. Use a slight twisting motion to ensure a good bond.
- Continue placing tiles, working outward from the center in a systematic pattern. Make sure to place tile spacers between the tiles to maintain even spacing and create uniform grout lines.
- Periodically check the tiles with a level to ensure they are laying flat and even. Adjust as necessary, tapping gently with a rubber mallet.
- As you work, periodically remove any excess adhesive that may squeeze up between the tiles. Wipe it away with a damp sponge before it dries.

Cutting and Adjusting Tiles
Inevitably, you’ll need to make cuts and adjustments to the tiles to fit them properly in the space. Follow these steps to ensure clean and accurate cuts:
- Measure and mark the tiles that need to be cut. Use a pencil or marker to indicate where the cut will be made.
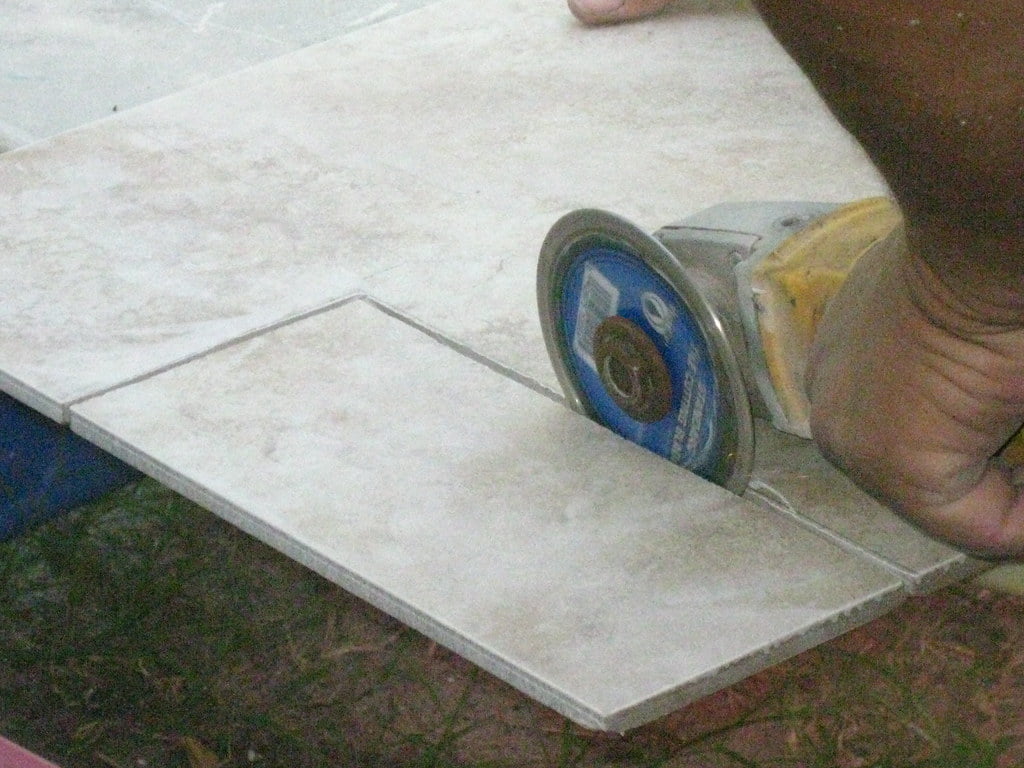
- Use a tile cutter or wet saw to make the cuts. Score the tile with the cutter or guide it along the blade of the wet saw, depending on the tool you’re using. Take your time and make smooth, even cuts.
- Smooth the edges of the cut tiles if necessary. Use a tile file or sandpaper to remove any rough edges or burrs.
- Test the cut tile in its designated space to ensure it fits properly. Make any adjustments as needed before moving on.
Grouting the Tile
Grouting is the final step in laying tile and is essential for a finished and polished appearance. Follow these steps to grout your tiles:
- Choose the right grout color and type for your project. Consider the color of your tiles and the overall aesthetic you want to achieve. Additionally, choose between sanded or unsanded grout, depending on the width of your grout lines.
- Mix the grout according to the manufacturer’s instructions. Use a bucket and a drill with a mixing attachment to ensure proper consistency.
- Apply the grout with a float, spreading it diagonally across the tiles to fill the joints. Work in small sections at a time to prevent the grout from drying out before you can clean it off the tiles.
- Wipe away excess grout with a damp sponge. Rinse the sponge frequently and make sure to remove any excess grout from the surface of the tiles.
Allowing the Tile to Set
After grouting, it’s important to allow the tile to set and cure properly. Follow these recommendations to ensure a strong and long-lasting installation:
- Follow the recommended drying times provided by the grout manufacturer. This may vary depending on the type of grout used and the humidity levels in your area.
- Avoid stepping on the newly laid tile until it has fully cured. This can take anywhere from 24 to 72 hours, depending on the type of adhesive and grout used.
- Take care not to expose the freshly grouted tile to excessive water or moisture during the curing process. This can interfere with the grout’s ability to dry properly and may result in discoloration or other issues.
Final Clean-up and Maintenance
Once the tile has fully set, it’s time for final clean-up and maintenance. Follow these steps to complete your tile installation:
- Remove grout haze using a grout remover. This haze is a thin film that can form on the surface of the tiles during the grouting process. Follow the manufacturer’s instructions to safely and effectively remove the haze without damaging the tiles.
- Clean the tiles with a pH neutral cleaner. Avoid harsh chemicals or abrasive cleaners that can damage the surface of the tiles. Use a soft sponge or cloth to gently clean the tiles, paying attention to any grout lines or textured surfaces.
- Follow the tile manufacturer’s maintenance guidelines for ongoing care and maintenance. Different types of tiles may have specific recommendations for cleaning, sealing, or regrouting. By following these guidelines, you can keep your tile looking its best for years to come.
With these comprehensive steps and tips in mind, you’ll be well-equipped to lay tile like a pro. Remember to take your time, follow the instructions for each step, and have all the necessary tools and materials on hand. With a little patience and attention to detail, you’ll have a beautiful and functional tiled space in no time.


