
So you’ve got a pumpkin sitting on your porch, just waiting to be transformed into a spooky masterpiece for Halloween. But where do you start? In this article, you will learn all the tips and tricks for carving a pumpkin like a pro. From choosing the perfect pumpkin to creating intricate designs, we will guide you through each step of the process. Get ready to impress your friends and neighbors with your pumpkin carving skills!
Choosing the Right Pumpkin
When it comes to carving the perfect pumpkin, you want to start with the right one. Size, shape, and texture are all factors to consider when choosing your pumpkin.
Size
The size of the pumpkin will depend on your intended design and where you will be displaying it. If you’re planning to create an intricate carving, a smaller pumpkin may be easier to work with. On the other hand, if you want your pumpkin to make a bold statement, a larger one will do the trick. Consider the space you have available and the overall effect you want to achieve.
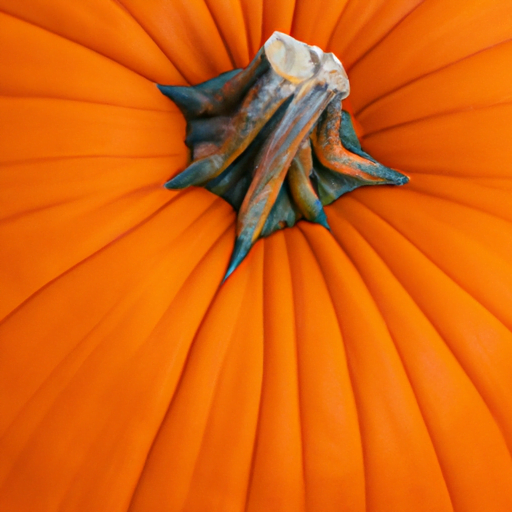
Shape
The shape of the pumpkin can greatly impact the final appearance of your carving. While round pumpkins are the most common, don’t be afraid to get creative with different shapes. Tall and narrow pumpkins can lend themselves well to carving tall characters or scenes, while squat and wide pumpkins can be perfect for funny or whimsical designs. Take your time to find a pumpkin with a shape that suits your vision.
Texture
The texture of the pumpkin’s skin can also play a role in your carving. Pumpkins with smooth skin are generally easier to work with, allowing your tools to glide smoothly. However, pumpkins with more textured skin can add depth and dimension to your carving. Consider the design you have in mind and choose a pumpkin with a texture that complements it.
Gathering the Necessary Tools
Before you dive into the carving process, it’s essential to gather all the necessary tools. Having the right equipment on hand will make the carving process much smoother and more enjoyable.
Pumpkin carving kit
A pumpkin carving kit is a must-have for any carving enthusiast. These kits typically include specialized tools such as serrated saws, scoops, and carving tools designed specifically for pumpkins. Look for a kit with a variety of tools to give you options when creating your design.
Knife or serrated saw
In addition to a pumpkin carving kit, you may also want to have a knife or serrated saw on hand. These tools can be helpful for making precise cuts or creating more intricate designs. Choose a knife or saw that feels comfortable in your hand and has a sharp blade.
Scoop or spoon
To remove the pumpkin’s insides, you’ll need a scoop or spoon. This tool will allow you to easily and efficiently scoop out the seeds and pulp. Look for a scoop or spoon with a sturdy handle and a wide, curved edge for maximum scooping power.
Stencil or marker
If you’re not confident in your freehand carving skills, a stencil or marker can be a valuable tool. Stencils and templates are available in a wide range of designs and can help you create more intricate and professional-looking carvings. Alternatively, a marker can be used to trace a design onto the pumpkin before carving.
Candles or LED lights
Finally, don’t forget the lights! Whether you prefer traditional candles or modern LED lights, adding illumination to your carved pumpkin brings it to life. Candles create a warm, flickering glow, while LED lights provide a safer and longer-lasting option. Choose whichever lighting option suits your personal preference and display setting.
Preparing the Work Area
Now that you have all your tools ready, it’s time to prepare your work area. Taking a few minutes to set up properly will make the carving process more comfortable and efficient.
Covering the surface
Covering the surface you’ll be working on is essential to protect it from pumpkin guts and any potential mess. Lay down newspaper, an old plastic tablecloth, or even a garbage bag to create a barrier between your pumpkin and the surface. This will make cleanup a breeze and save your table or floor from any potential stains or damage.
Setting up proper lighting
Good lighting is crucial when carving a pumpkin, as it allows you to see your design clearly and make accurate cuts. Position a bright light source, such as a lamp, flashlight, or work light, near your work area to illuminate the pumpkin from different angles. This will help you spot any imperfections or areas that need adjustment.
Creating a disposal area
Carving a pumpkin can get messy, so it’s important to set up a disposal area for the pumpkin’s insides. Place a garbage bag or container nearby to collect the seeds and pulp as you scoop them out. This will keep your work area tidy and make it easier to clean up when you’re done.
Creating the Design
Now that your work area is ready, it’s time to create your design. You have a few different options when it comes to deciding on a design for your pumpkin.
Freehand carving
For those confident in their artistic abilities, freehand carving is a popular choice. Grab a marker or pencil and sketch your design directly onto the pumpkin’s surface. This technique allows for complete creative freedom and can result in unique and personalized carvings. However, keep in mind that freehand carving takes skill and practice.
Using stencils or templates
If you’re not as comfortable with freehand carving, using stencils or templates can be a great option. Stencils can be found online or in pumpkin carving kits, and they provide a precise outline for your design. Simply select a design, tape the stencil onto the pumpkin, and trace the design onto the surface. This method ensures a more consistent and professional-looking carving, even for novice carvers.
Removing the Top and Scooping the Insides
Before you can start carving, you need to prepare the pumpkin by removing the top and scooping out the insides.
Tracing a circle
To remove the top of the pumpkin, start by tracing a circle around the stem. This will serve as a guide for making an even cut.
Cutting along the traced line
Using a serrated knife or saw, carefully cut along the traced line. Take your time and use a sawing motion for better control and a cleaner cut. Remember to angle the knife or saw slightly inward so that the top piece will fit securely back into place.
Removing the pumpkin lid
Once you have cut all the way around, gently lift off the pumpkin lid. Set it aside for later use or disposal.
Scooping out the seeds and pulp
With the lid removed, it’s time to scoop out the seeds and pulp from inside the pumpkin. Use a scoop or spoon to scrape the insides, making sure to remove all the strings and seeds. Take your time and be thorough, as any remaining seeds or pulp can cause mold and spoil the pumpkin’s longevity.
Transferring the Design onto the Pumpkin
Now that your pumpkin is hollowed out, it’s time to transfer your chosen design onto the pumpkin’s surface.
Taping the stencil onto the pumpkin
If you’re using a stencil or template, tape it securely onto the pumpkin. Make sure it is centered and aligned with your desired position. Use additional tape to hold down any intricate details or small sections.
Tracing the design onto the pumpkin
With the stencil in place, trace the design onto the pumpkin using a marker or pencil. Apply firm pressure, but be sure not to press too hard and risk damaging the pumpkin’s skin. Follow all the lines and details of the stencil to ensure an accurate transfer.
Carving the Pumpkin
Now comes the exciting part – carving your pumpkin!
Using a carving saw
Using a dedicated pumpkin carving saw or a small serrated knife, carefully follow the traced lines to carve out your design. Saw in a gentle back-and-forth motion, applying light pressure. Take your time and go slowly to avoid any mistakes or mishaps.
Sawing along the traced lines
As you carve, remember to saw along the traced lines, staying as close to the lines as possible. Slow and steady wins the race, so don’t rush the process. If there are any intricate or detailed sections, use smaller carving tools or kitchen knives to make precise cuts.
Taking breaks to avoid hand fatigue
Carving a pumpkin can be a physically demanding task, especially when working on intricate designs or larger pumpkins. Take breaks as needed to rest your hands and avoid fatigue. This will help maintain your focus and precision throughout the carving process.
Adding Details and Depth
Once you’ve completed the basic carving, it’s time to add details and depth to your design.
Carving different depths
One effective technique for adding depth and dimension to your pumpkin is to carve varying depths. By carving shallow sections and deeper sections, you can create shadows and highlights within your design. Experiment with different depths to give your carving a more three-dimensional and visually interesting appearance.
Creating texture and shadows
Texture can make a carving stand out and add visual interest. Use your carving tools to create texture on certain areas of your design, such as rough surfaces, wrinkles, or scales. Additionally, carving deeper sections can create shadows, giving your design more depth and dimension.
Making intricate cuts
If you have chosen a design with intricate details, take your time to carefully carve these areas. Use smaller carving tools, such as gouges or paring knives, to make precise cuts. Be patient and go slowly to avoid any accidental slips or mistakes.
Cleaning Up the Pumpkin
When you have finished carving, it’s time to clean up your pumpkin and make it look its best.
Removing excess debris
Use your hands or a small brush to remove any excess debris from the carved sections. This will help your design stand out and look clean and polished. Be gentle to avoid accidentally damaging any delicate sections or accidentally removing pieces of your carving.
Wiping the pumpkin surface
Use a damp cloth or paper towel to gently wipe the entire surface of the pumpkin. This will remove any dirt, smudges, or marker residue, leaving your carving looking fresh and vibrant. Take care not to wipe off any marker lines that may still be visible, as you may need them for touch-ups or reference later on.
Displaying the Carved Pumpkin
Now that your carved pumpkin is looking its best, it’s time to display it for everyone to see and enjoy.
Placing the pumpkin on a stable surface
Choose a stable and level surface to showcase your carved pumpkin. A porch, table, or even a dedicated pumpkin display platform are all great options. Ensure that the surface is clean and secure to prevent the pumpkin from rolling or falling.
Inserting candles or LED lights
To bring your pumpkin carving to life, insert candles or LED lights into the pumpkin. Traditional candles add a warm and flickering glow, creating a cozy and traditional atmosphere. LED lights, on the other hand, provide a safer and longer-lasting option. Choose whichever lighting option suits your preference and consider the desired ambiance you want to create.
Choosing an appropriate location
Decide on the perfect location to showcase your carved pumpkin. Whether it’s on your front porch, in the window, or as the centerpiece of your Halloween display, consider the best spot to highlight your hard work. Take into account visibility, safety, and the overall theme or setting of your Halloween decorations.
Remember, carving a pumpkin is a fun and creative activity that allows you to express your artistic side. Take your time, enjoy the process, and be proud of the unique masterpiece you create. Happy pumpkin carving!