So you just bought a new TV and can’t wait to start streaming your favorite shows and movies. But before you can immerse yourself in the world of entertainment, you need to figure out how to connect your TV to a streaming device like Roku, Amazon Fire TV, or Apple TV. Don’t worry, though, because in this article, we’ll walk you through the simple steps to get your TV hooked up and ready for endless binge-watching sessions.
Choosing the Right Device
When it comes to choosing a streaming device for your TV, there are a few important factors to consider. Some of the most popular options on the market are Roku, Amazon Fire TV, and Apple TV. Each of these devices comes with its own unique features and benefits, so it’s important to understand the differences before making a decision.
One of the first things you should consider is the compatibility of the device with your TV. Not all TVs are equipped with the necessary ports to connect streaming devices, so it’s essential to check the specifications of your TV before purchasing a device. Roku, Amazon Fire TV, and Apple TV all require an HDMI port for connection, so make sure your TV has one available.
Another important consideration is the preferred streaming platform. Each of these devices offers access to a wide range of streaming services, but some may have more options than others or different exclusive content. Take some time to research which streaming platforms are available on each device and determine whether they align with your preferences and streaming needs.
Connecting Roku to Your TV
Once you have chosen Roku as your preferred streaming device, it’s time to connect it to your TV. The process is relatively straightforward and only requires a few simple steps.
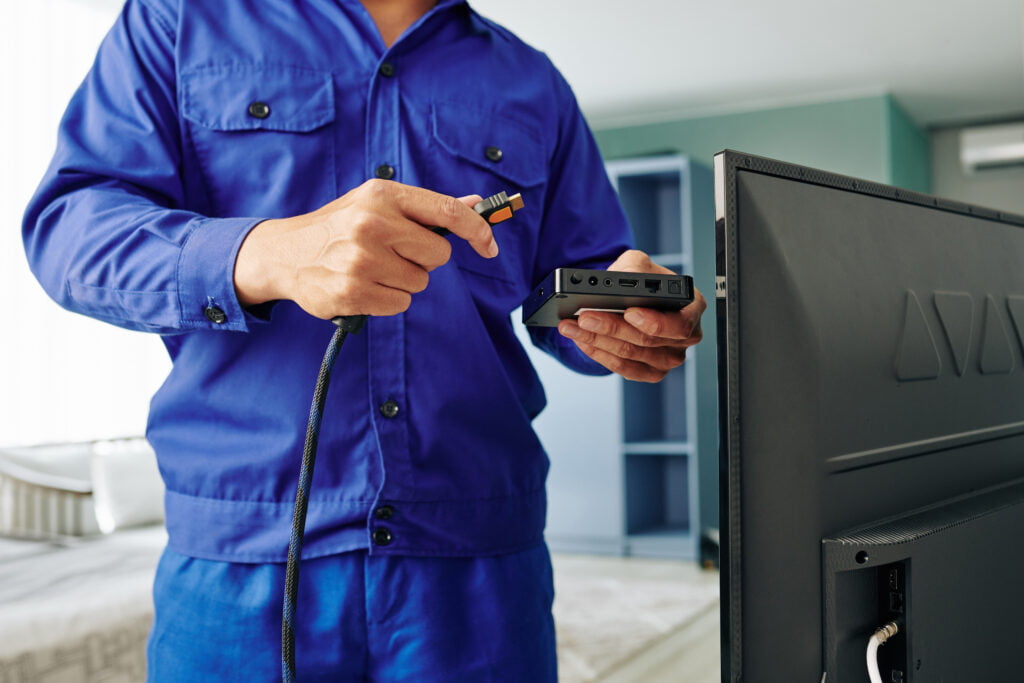
Start by using an HDMI cable to connect the Roku device to your TV. Locate the HDMI port on your TV and plug one end of the cable into the port, and the other end into the HDMI port on the Roku device.
Next, you’ll need to plug in the power adapter for the Roku device. Connect the power adapter to the Roku device and then plug it into a power source, such as a wall outlet.
Finally, turn on your TV and select the appropriate HDMI input channel. The Roku device should automatically detect the connection and display the setup screen on your TV. Follow the on-screen instructions to complete the setup process, including connecting to your Wi-Fi network and signing in to your Roku account if necessary.
Connecting Amazon Fire TV to Your TV
If you’ve decided to go with Amazon Fire TV, connecting it to your TV is quite simple. Just follow these easy steps.
Start by connecting the Fire TV stick to an available HDMI port on your TV. Insert the Fire TV stick into the HDMI port firmly, ensuring a secure connection.
Next, plug in the power adapter for the Fire TV stick. Connect the power adapter to the Fire TV stick and then plug it into a power source, such as a wall outlet.
Once everything is connected, turn on your TV and select the appropriate HDMI input channel. The Fire TV stick will automatically power up and display the setup screen on your TV.
Follow the on-screen instructions to complete the setup process. This will include connecting to your Wi-Fi network and signing in to your Amazon account if necessary.
Connecting Apple TV to Your TV
If Apple TV is your preferred streaming device, connecting it to your TV is a breeze. Just follow these steps.
Start by connecting Apple TV to your TV using an HDMI cable. Locate the HDMI port on your TV and plug one end of the cable into the port, and the other end into the HDMI port on the Apple TV device.
Next, plug in the power cord to power up the Apple TV device. Connect one end of the power cord to the Apple TV device and the other end to a power source, such as a wall outlet.
Now it’s time to configure Apple TV. Turn on your TV and select the appropriate HDMI input channel. The Apple TV device will automatically detect the connection and display the setup screen on your TV.
Follow the on-screen prompts to set up Apple TV, including connecting to your Wi-Fi network and signing in to your Apple ID if required.
Connecting to the Internet
Once you have successfully connected your streaming device to your TV, the next step is to connect it to the internet. This is crucial for streaming content from various online platforms. Here’s how you can do it:
Start by accessing the settings menu on your streaming device. The location of this menu may vary depending on the device, but it is typically found either in the main menu or as an option within the settings sub-menu.
Once you have found the settings menu, navigate to the network settings. This is where you will be able to connect your streaming device to your home Wi-Fi network.
Choose your Wi-Fi network from the available options and enter the password if prompted. Make sure to enter the correct password to establish a secure connection.
After you have entered the network credentials, wait for the streaming device to connect to the Wi-Fi network. Once the connection is established, you should see an indication on the screen confirming the successful connection.
It is essential to ensure a stable internet connection for smooth streaming. If you experience buffering or lagging issues, consider moving your streaming device closer to your Wi-Fi router or upgrading your internet connection to a higher speed plan.
Troubleshooting Connection Issues
Sometimes, despite following all the steps correctly, you may encounter connection issues between your streaming device and your TV. If this happens, don’t worry. Here are a few troubleshooting steps you can try to resolve the problem:
First, check the HDMI ports on both your TV and streaming device. Ensure that the HDMI cables are securely plugged in. Sometimes, a loose connection can cause issues with the display or sound.
If checking the connections doesn’t solve the problem, try disconnecting and reconnecting all cables. This can help reset the connection and resolve any minor glitches.
If the issue still persists, try restarting both your TV and streaming device. Power them off completely, wait for a few seconds, and then power them back on. This can often resolve many common issues by refreshing the system.
If you continue to experience connection problems, consult the troubleshooting guide or support resources provided by the manufacturer of your streaming device. They may have specific solutions or recommendations for resolving the issue.
Configuring Network Settings
Configuring the network settings on your streaming device is an important step to ensure that you have a stable and secure internet connection. Here’s how you can do it:
Access the settings menu on your streaming device. The location of this menu may vary depending on the device, but it is usually found either in the main menu or as an option within the settings sub-menu.
Once you have accessed the settings menu, navigate to the network settings. Look for options like “Network,” “Connections,” or “Wi-Fi” to find the necessary menu.
From the network settings menu, choose your Wi-Fi network from the available options. If prompted, enter the password for your Wi-Fi network. Make sure to enter the correct password to establish a secure connection.
Once you have entered the network credentials, wait for the streaming device to connect to the Wi-Fi network. You should see an indication on the screen confirming the successful connection.
Please note that the steps for configuring network settings may vary slightly depending on the streaming device you are using. However, the basic process remains the same for most devices.
Setting Up Streaming Accounts
To fully enjoy the streaming experience on your TV, it is important to create an account for your preferred streaming platform and link it to your streaming device. Here’s how you can do it:
Start by creating an account for your preferred streaming platform. Visit the website of the streaming platform, such as Netflix, Hulu, or Disney+, and follow the instructions to create an account. You may need to provide personal information and payment details, depending on the platform.
Once you have created an account, navigate to the settings menu on your streaming device. Look for options like “Account” or “Settings” to find the necessary menu.
Within the settings menu, locate the option to add or link a streaming account. This may be labeled as “Add Account,” “Link Account,” or something similar.
Follow the on-screen instructions to link your streaming account to your streaming device. This is usually done by entering your account credentials, such as your username and password, within the device’s settings.
After successfully linking your streaming account, you should have access to all the content and features available on the platform. You can now start streaming your favorite movies, TV shows, and more directly on your TV.
Adjusting Display and Audio Settings
To optimize your streaming experience, you may need to adjust the display and audio settings on your streaming device. This will help ensure that you have the best possible picture quality and audio output. Here’s how you can do it:
Navigate to the settings menu on your streaming device. Look for options like “Display,” “Audio,” or “Picture Settings” to find the necessary menu.
Once you have found the relevant settings menu, adjust the display resolution and aspect ratio according to your preferences. Higher resolution settings can provide a clearer and more detailed picture, but they may require a faster internet connection or more bandwidth.
Next, optimize the audio output settings. Depending on your setup, you may have options like “Stereo,” “Surround Sound,” or “Dolby Digital.” Choose the setting that matches your audio setup or personal preferences.
Make sure to save your changes after adjusting the display and audio settings. The streaming device will apply the new settings, and you should see and hear the difference in your streaming experience.
Enhancing your Streaming Experience
While you can enjoy streaming content on your TV with just the streaming device, there are a few additional steps you can take to enhance your streaming experience further. Here are some suggestions:
Consider connecting external audio devices to your TV for improved sound quality. You can connect a soundbar, surround sound system, or even wireless speakers to enhance the audio output. This can provide a more immersive and engaging experience, especially for movies and shows with dynamic soundtracks.
Upgrade your internet connection if you frequently experience buffering or lagging issues. A faster internet connection with higher bandwidth can ensure smoother streaming, especially for high-definition or 4K content. Contact your internet service provider to explore available options and upgrade your plan if necessary.
If you find yourself juggling multiple remote controls, consider purchasing a universal remote. A universal remote can simplify the control of your TV, streaming device, and other connected devices, allowing you to navigate between different inputs and functions with ease.
By following these steps and making a few additional enhancements, you can create a seamless and enjoyable streaming experience right from the comfort of your living room. Whether you choose Roku, Amazon Fire TV, or Apple TV, you can now connect your TV to a streaming device and unlock a world of entertainment at your fingertips. Happy streaming!


